Walkthrough 5-5: Add client ID enforcement to an API specification
In this walkthrough, you add client ID enforcement to the API specification. You will:
· Modify an API specification to require client id and client secret headers with requests.
· Update a managed API to use a new version of an API specification.
· Call a governed API with client credentials from API portals.
Note: If you do not complete this exercise for Fundamentals, the REST connector that is created for the API and that you use later in the course will not have client_id authentication.
Starting file
This walkthrough uses Anypoint Platform. There is no starting file. To complete the walkthrough, you must have completed the preceding walkthrough.
Copy the traits required to add authentication to the API specification
1. Return to the browser tab with the Settings page for American Flights API v1 in API Manager.
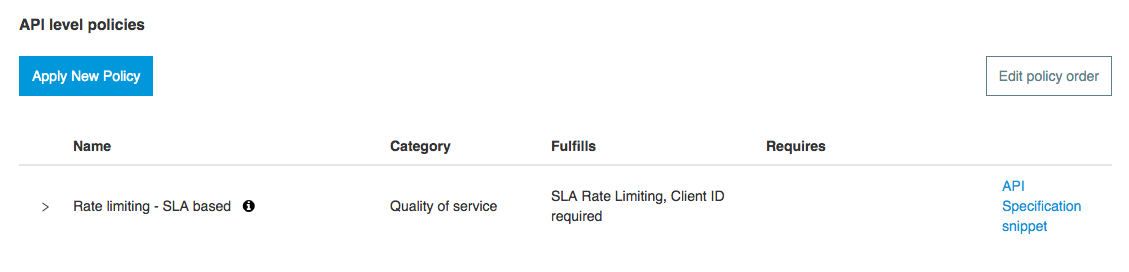
2. In the left-side navigation, select Policies.
3. Click the API Specification snippet link for the Rate limiting – SLA based policy.
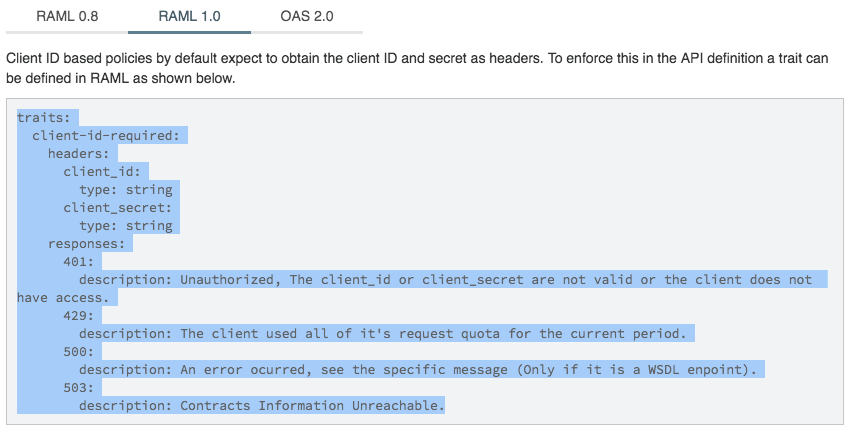
4. In the API Specification snippet for Rate limiting - SLA based dialog box, select RAML 1.0.
5. Copy the value for the traits.
6. Click Close.
Add authentication headers to the API specification
7. Return to the browser tab with your API in Design Center.
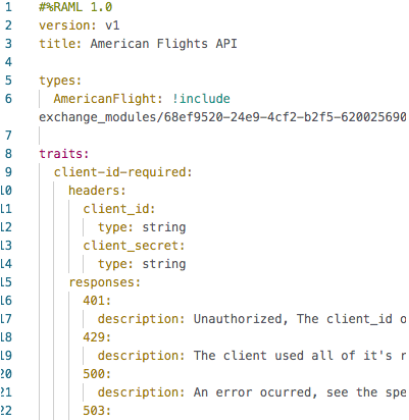
8. Go to a new line after the types declaration and paste the traits code you copied.
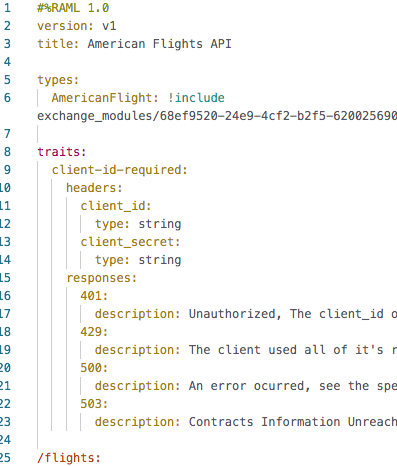
9. Go to a new line after the /flights resource declaration and indent.
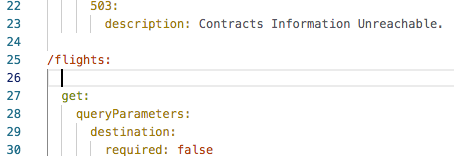
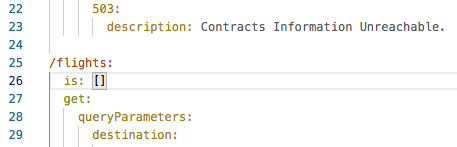
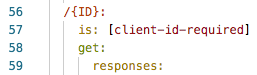
10. Add a nested is node with an empty array.
is: []
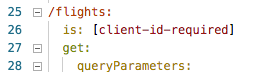
11. Make sure the cursor is inside the array brackets and add the client-id-required trait name as an array element.
12. Repeat this process so the trait is applied to all methods of the {ID} resource as well.
Test the API in the API console in Design Center
13. In the API console, turn on the mocking service.
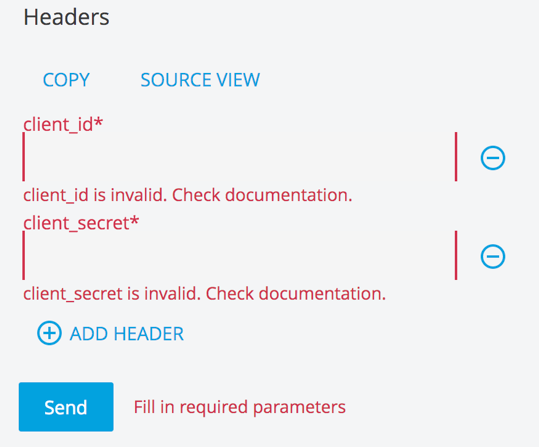
14. Select one of the resources and click Try it.
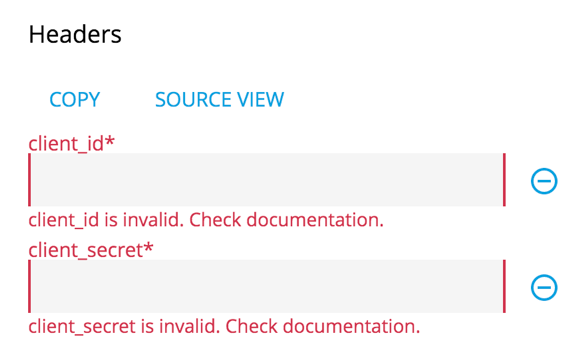
15. In the Headers section, you should now see fields to enter client_id and client_secret.
16. Look at both fields; you should see invalid data error messages for each.
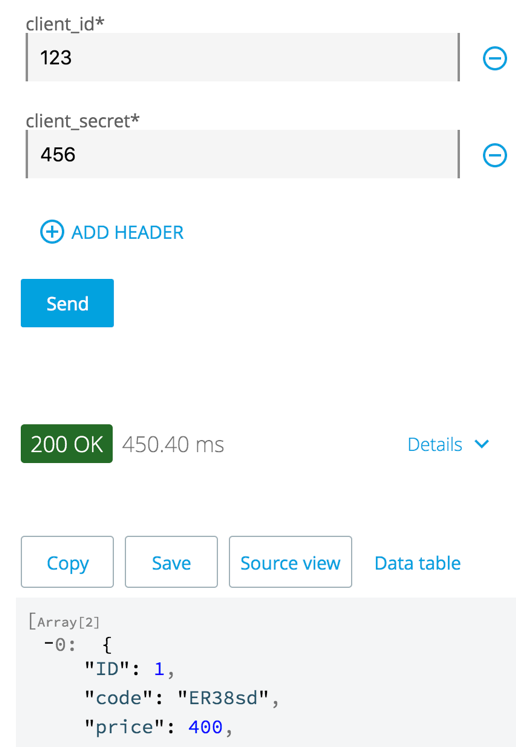
17. Enter any values for the client_id and client_secret and click Send; you should get a 200 response with the example results.
Publish the new version of the API to Exchange
18. Turn off the mocking service.
19. Click the Publish button.
20. Click the Publish to Exchange button.
21. In the American Flights API dialog box, note the asset version and click Publish to Exchange.
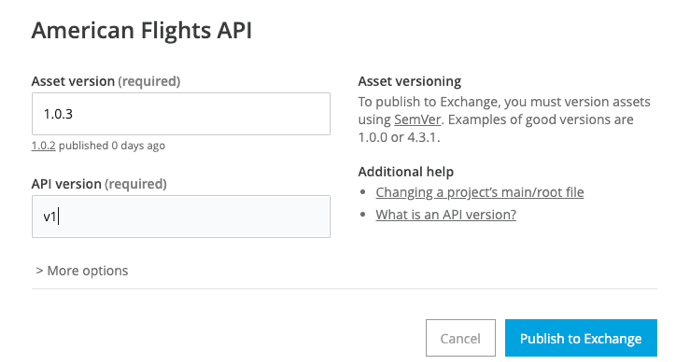
22. After the API is published, click Done in the American Flights API dialog box.
Update the managed API instance to use the new version of the API specification
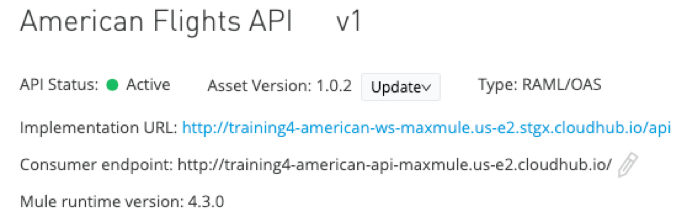
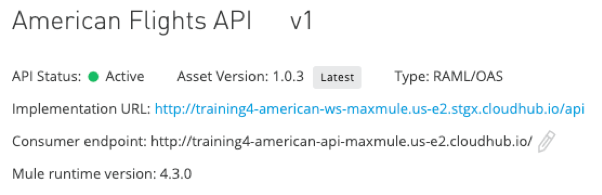
23. Return to browser tab with American Flights API v1 in API Manager.
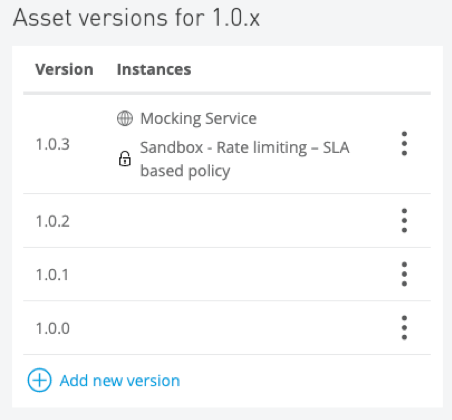
24. Refresh the page then locate the asset version displayed at the top of the page; you should see 1.0.2 and a new Update drop-down menu next to it.
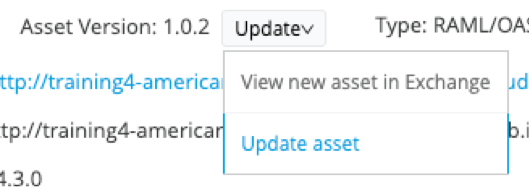
25. Select Update asset in the Update drop-down menu.
26. In the Update asset version dialog box, select 1.0.3 in the drop-down menu.
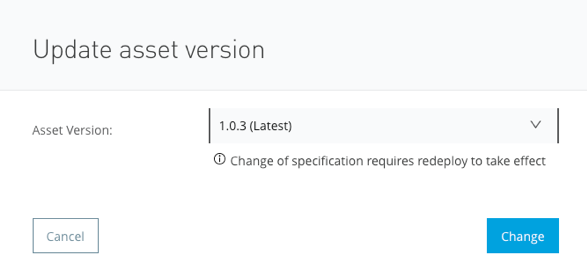
27. Click Change; you should see the 1.0.3 asset version displayed at the top of the page with the Latest label next to it.
Redeploy a new proxy
28. In the left-side navigation, select Settings.
29. Scroll down to the Deployment Configuration settings
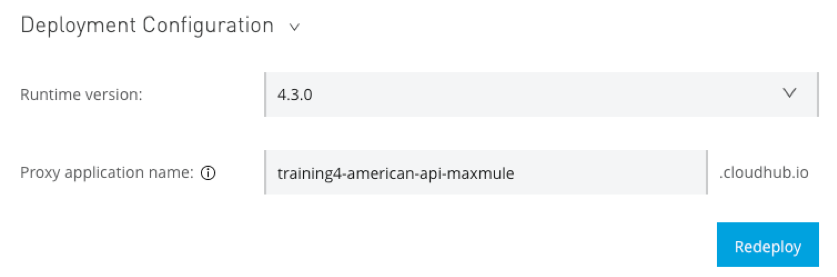
30. Click Redeploy.
31. In the Deploying to CloudHub dialog box, click the Click here link to see the logs.
32. Watch the logs and wait until the proxy application is redeployed.

33. Close the browser tab.
34. Return to the browser tab with API Manager and click Close in the Deploying to CloudHub dialog box.
Test the rate limiting – SLA based policy in the API console in Exchange
35. Return to the browser tab with Exchange.
36. Return to the home page for the API (and refresh if necessary); you should see the new asset version listed.
37. Click the GET method for the flights resource; you should see required text fields for client_id and client_secret and no longer need to add the headers manually for each request.
Note: You will test and use the authentication with the REST connector later in the Fundamentals course.
38. Close all Anypoint Platform browser windows and tabs.